Showing posts with label Main Dishes. Show all posts

Friday, May 10, 2019

Chicken Parmesan

I must admit, Keely has become quite the cook, and she is fearless about trying new recipes. I love that! She spoils Max with Chicken Parmesan, his favorite, and often serves it to her guests. I'm grateful that she agreed to make it for me and my cousin Fred who was visiting from Texas last week. Not surprisingly, it lived up to its reputation. I honestly haven't had any better. It's sooooo good. 


Keely's Chicken Parmesan

To begin, prepare your chicken by pounding it with a meat mallet. Don't have one? No worries. I didn't either. Instead, we used a large rubber mallet covered with plastic wrap. Problem solvers. That's us. :) Next, season both sides with Paula Deen's seasoning and then sprinkle with flour.


Preparing the Chicken

Now dip the prepared chicken into beaten eggs, followed by a bread crumb/Parmesan cheese mixture. 


A side benefit: this recipe calls for an air fryer, so it's lower in calories than other versions. If you don't have one, this recipe alone is worth getting one! In fact, Keely has said more than once that it's her favorite kitchen appliance. Period. "Fry" both sides for approximately 2-3 minutes each.


Keely's favorite kitchen appliance is the air fryer!

Although the chicken is "fried," the last step calls for baking it in the oven. First, though, top it with marinara sauce, Italian seasoning, a little more shredded Parmesan cheese, and lastly a slice of Provolone cheese.


Once baked, serve it on top of spaghetti covered with additional marinara sauce. Enjoy!

(Note that this recipe can easily be made gluten-free, which is how Keely makes it. Simply replace the flour, bread crumbs, and spaghetti noodles with gluten-free alternatives.) 


Chicken Parmesan

Ingredients:

  • 3 chicken breasts
  • Paula Deen's seasoning (salt, pepper, garlic powder) to taste
  • Approximately 6 tablespoons of regular flour (Use Cup4Cup if gluten-free.)
  • 2 eggs
  • 1 heaping cup Panko bread crumbs (Or use gluten-free Panko.)
  • 1/2 heaping cup shredded Parmesan cheese, plus a little more for topping
  • 1 to 1.5 jars of marinara sauce (Keely prefers Rao's.)
  • Italian seasoning to taste
  • 3 slices Provolone cheese
  • Spaghetti noodles (Use Barilla if gluten-free.)

Directions:

  1. Preheat oven to 450 degrees.
  2. Pound chicken breasts with a meat mallet to the thickness of approximately 1/3 inch and then season both sides with Paula Deen's seasoning.
  3. Sprinkle/dust flour on both sides of the chicken breasts (approximately 1 tablespoon for each side) and lightly pat down to make sure it's a light, even coating.
  4. Beat eggs in a shallow bowl.
  5. In a separate bowl, combine bread crumbs and Parmesan cheese.
  6. Dip flour coated chicken breasts into beaten eggs. Transfer breasts to bread crumb mixture, pressing the crumbs into both sides. Repeat for all breasts.
  7. Put air fryer on highest setting (mine is 390 degrees). Spray Pam on air fryer basket to avoid sticking. Cook breast for 2-3 minutes, flip and then repeat.
  8. Place cooked chicken in a baking dish that has been lined with aluminum foil and sprayed with Pam. Top each breast with about 1/3 cup of marinara sauce. Sprinkle Italian seasoning on top of the sauce and breast. Lightly top with shredded Parmesan cheese. Top with a slice of Provolone cheese.
  9. Bake at 450 degrees approximately 15-20 minutes until cheese is browned and bubbly and the chicken breasts are no longer pink inside. (165 using a meat thermometer) 
  10. Serve over spaghetti noodles (cooked according to directions) and topped with additional heated marinara sauce.

Sunday, October 1, 2017

Pizza Dough

Keely sure does spoil me. For Mother's Day this year, she gave me a Big Green Egg! Ever since, I knew I wanted to learn how to make a great pizza on it. I began this journey by taking a "Bread, Butter, and Jam" cooking class in our community a few weeks ago, taught by my friend Sadira who is a wonderful cook. (Thanks, Sadira, for a wonderful lesson!) Most people who know me already know I make bread, but not this kind. This is artisan bread, which I thought would make a better pizza dough than my sourdough bread.

When Scott and Tina came down for a visit last weekend, I knew it would be the perfect time to experiment. Since I had never done this before, I didn't know how large each pizza would be. So just in case, I doubled the batch of dough. We ended up with a variety of six large pizzas for only three people. What the heck. We had a great time making them and an even better time sampling each one!

Prepare dough 1-5 days in advance.
Like my sourdough bread, it's best to know in advance and plan accordingly because the pizza dough is best when allowed to set for at least 1-5 days. I made my two batches of dough on a Tuesday given that we were going to make pizza on a Friday night. I placed each batch of dough in a gallon ziplock bag and then stored each in the refrigerator. By the fourth day, the dough had doubled in size.

Each batch of dough makes 3 large pizzas approximately 12-14" in diameter. Once the dough is divided, you basically just stretch and fold the dough 4 times, then allow the dough to rest for approximately 20 minutes. While resting, cover the dough with a thin wet dish towel to prevent the dough from drying out. Repeat the stretch-fold-rest cycle five times. For the last cycle though, let the dough rest for approximately an hour so that the dough will rise about 1.5 times in size.

"Stretch and Fold" 4 times for each loaf.
Rest for 20 minutes for each of the first four Stretch-Fold-Rest cycles.
Let dough rest about an hour for the final cycle so that it rises 1.5 times in size.
Now you're ready to make the crust. Place each round of dough onto a floured surface to remove some of the stickiness. Next, shape each round of dough into a thin pizza crust. I tried using a rolling pin, but letting it rotate in the air seemed to work better. (I'm definitely going to need more practice with this step. But seriously, who cares what the shape is?) Place on a pizza peel that has been generously coated with cornmeal so that it will easily slide off onto the Big Green Egg. Now for the fun part: choose your favorite toppings.

This isn't enough cornmeal. Use about twice this amount.
I'm working on the BBQ chicken pizza.

Tina and Scott are experimenting with their own toppings.

We went ahead and topped all of the pizzas. Next, slide one at a time onto the pizza peeler that has been generously coated with cornmeal. Bake each pizza for only 5 minutes in the Big Green Egg that has reached 500 degrees.

Scott's favorite: Olive oil, pesto, pizza blend cheese, sausage, sun-dried tomatoes, fresh oregano
Another favorite: Pesto, mozzarella, Roma tomatoes, bacon, fresh basil

Tina's invention: Olive oil, pimento cheese, pizza sauce, chicken, bacon, spinach, avocado, tomatoes, jalapeƱo peppers. So good!

White BBQ sauce, mozzarella, pulled chicken, cilantro, Rudy's BBQ sauce. Meh. Won't do this one again. 
Meat Lovers: Pizza sauce, pizza cheese blend, sausage, pepperoni, bacon, fresh oregano. Always a winner.

Another favorite: Olive oil, fig jam, mozzarella. Bake and top with prosciutto and arugula. 

The last one was my favorite as well as Tina's. In fact, now I'm on a mission to make a batch of fig jam! Stay tuned . . .


Pizza Dough

Ingredients:

  • 1 teaspoon active dry yeast
  • 2 cups water at room temperature
  • 4-1/2 cups bread flour
  • 1-1/2 teaspoons salt
  • Cornmeal

Directions:

  1. Mix yeast and water. Set for 2 minutes. Add bread flour to yeast mixture. Place salt on top of bread flour. Mix together for approximately 2 minutes with either a stand mixer or by hand. The dough will be soft and sticky. Place in a gallon ziplock bag and refrigerate for 1-5 days so that the dough will double in size.
  2. Preheat Big Green Egg (or oven) to 500 degrees.
  3. Divide dough into 3 equal parts. Stretch and fold each round of dough 4 times, then allow the dough to rest for approximately 20 minutes. While resting, cover the dough with a thin wet dish towel to prevent the dough from drying out. Repeat the stretch-fold-rest cycle five times. For the last cycle though, let the dough rest for approximately an hour so that the dough will rise about 1.5 times in size. 
  4. Now you're ready to make the crust. Place each round of dough onto a floured surface to remove some of the stickiness. Next, shape each round of dough into a thin pizza crust. Place on a pizza peeler that has been generously coated with cornmeal so that it will easily slide off onto the Big Green Egg. 
  5. Top each crust with your favorite toppings. 
  6. Bake each pizza for only 5 minutes in the Big Green Egg that has reached 500 degrees.
Note: For artisan bread, only use 1.5 cups of water. Follow steps 1-3 above. Score the loaves and place on a floured cookie sheet. Lightly spray with water. Bake at 500 degrees for 5 minutes. Reduce the temperature to 450 degrees and bake for another 15 minutes or until done. 

Recipe adapted from the class, "Bread, Butter, and Jam" taught by Sadira Ebert at Southern 71, a wonderful place to "gather, shop, and share" in our Westhaven community.

Friday, April 8, 2016

Caramel French Toast

This week, our tennis captain, Margaret Ann, hosted a brunch to kick-off the spring Nalta season. We enjoyed two different types of quiche from The Puffy Muffin as well as their poppy seed bread. Fresh fruit was served as a healthy choice, but I'm not sure anyone had the willpower to refuse her caramel French toast. If you're looking for a decadent, yet easy, perfect recipe for brunch, look no further. This stuff was amazing!


After we enjoyed the meal and conversation, our fearless captains gifted each of us with our new team uniform: bright, fluorescent yellow shoe laces. :D (Thanks Mam and Nancy!) They definitely brought us luck as we won our season opener in our new A-3 division.

I'm predicting this is going to be one special season. In fact, they all have been. It takes a pretty special team to advance to a new division every season. Admittedly, I'll be especially embracing every moment given that Keely is now part of team Overserved . . . as my partner!

Caramel French Toast

Ingredients:
  • 1-1/2 cups packed brown sugar
  • 3/4 cup butter
  • 6 tablespoons light corn syrup
  • 10 French bread slices, torn (or homemade sourdough bread!)
  • 4 eggs, beaten
  • 2-1/2 cups milk
  • 1 tablespoon vanilla
  • 1/4 teaspoon salt
  • 3 tablespoons sugar
  • 1-1/2 teaspoon cinnamon
  • 1/4 cup butter, melted
Directions:
In medium saucepan, combine brown sugar, 3/4 cup butter and corn syrup. Cook over medium heat, stirring constantly for 5 minutes until bubbly. Pour syrup evenly into a lightly greased casserole dish. Place torn bread over syrup.
Combine eggs, milk, vanilla, and salt. Stir well and pour over bread. Cover and refrigerate at least 8 hours or overnight.
Preheat oven to 350 degrees. Combine sugar and cinnamon and sprinkle on top. Drizzle melted butter over top. Bake uncovered for 45-50 minutes or until bubbly and golden brown.


Thursday, January 21, 2016

Whole30 Potluck

On January 1, I accepted a new Whole30 challenge along with a group of ladies in our neighborhood committed to "Eating Good in the Hood." It's tough, I tell ya. But, so worth it. Essentially, it's a strict version of the Paleo diet: no grains, no dairy, no legumes, no alcohol, no sugar . . . for 30 days. While I have been quite satisfied typically having eggs for breakfast, salads for lunch, and some kind of meat and roasted veggies for dinner, admittedly boredom has set in.

So, last night, I was happy to host a Whole30 potluck for our small group. Just what I needed! We had such a variety of fantastic dishes.

Eating Good in the Hood:  Jocelyn, Jennifer, Anna, Martha, Dana, and Sadira

I made bison & butternut cocoa chili from the Practical Paleo cookbook by Diane Sanfilippo. I was hesitant because, honestly, who wants chocolate in their chili? I almost talked myself out of making it, but I'm glad I just went ahead and trusted the recipe. It was surprisingly really good! On a cold, wintery night, it's so nice to have a chili option without legumes. I substituted beef for the bison and actually used closer to 2 lbs of meat instead of 1 lb for a heartier, thicker chili.


Bison & Butternut Cocoa Chili

Dana made Asian meatballs from Nom Nom Paleo. I would have never thought to use sweet potatoes instead of a bread filler. Delicious! In fact, I'm looking forward to adding a few of the leftovers to compliant spaghetti sauce. Mmmmm.


Asian Meatballs

We were lucky that Sadira shared not one, but two of her Asian-inspired dishes.  Chicken tinola was a delicious soup made with chicken, bok choy, green papaya, onions, celery, garlic, ginger, and salt. The link above is a similar recipe from the internet that will serve as a starting point because Sadira is bad about cooking without a recipe. I'm jealous as I only wish I could cook like that!


Chicken Tinola

Sadira also made japchae. It was probably the biggest hit of the night. Pasta has always been one of my favorite dishes, so I've been using spaghetti squash or zoodles as a healthy substitute. However, I didn't even know this product existed. You make it just like spaghetti noodles, but it is made from sweet potato starch noodles. This will definitely become a pantry staple for me from now on. (Thanks, Sadira, for gifting me with my first bag!) As before, I've provided a link to a recipe for japchae online since Sadira doesn't use one. She used chicken instead of beef, though. I'm pretty sure there were no leftovers!

Japchae

Jocelyn made detoxifying chicken vegetable soup. I don't know how I overlooked taking a close-up of her with this amazing soup. (Sorry, Jocelyn!) It's the soup in the upper right hand corner in the photo below. With this soup, I learned so much about the healing properties of turmeric. Who knew? Don't let the healthy-sounding name stop you from trying this. Whole30 or not, this is a soup that I will be making from now on. So satisfying!

Detoxifying Chicken Vegetable Soup (see top right)

Anna made a side dish, combining beef, sweet potatoes, squash, onions, salsa, and taco seasoning. Anna, like Sadira, is also guilty of not using a recipe. :) I need to be more daring with combinations like this because it is very, very good!


Martha brought a Paleo salad made with organic mixed greens, spinach, roasted almonds, dried cranberries, and avocado. It was tossed with a wonderful dressing made from olive oil, sweet onion, balsamic vinegar, dry mustard powder, sea salt, an pepper. Such a beautiful presentation!


Paleo Salad

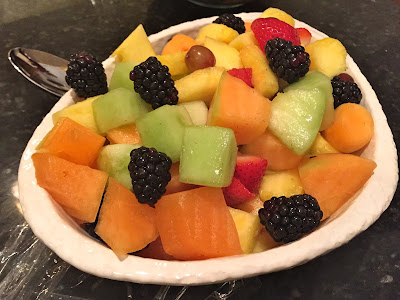
Since desserts are off-limits for Whole30, I served mixed fruit to round out the meal.


I also provided samples of RxBars, my go-to protein bar that is quite tasty. They're great for ballgames or movies when everyone else heads to the concession stand. The sweetness comes from dates. I even love their tagline: No Added Sugar, No GMO, No Dairy, No Soy, No Gluten, No B.S. :)


I'm so grateful for this night of fellowship. Great food. Great conversation. I learned so much! My last ten days of Whole 30 will be a piece of cake . . . the healthy kind, that is!

Wednesday, February 11, 2015

Pie Bird

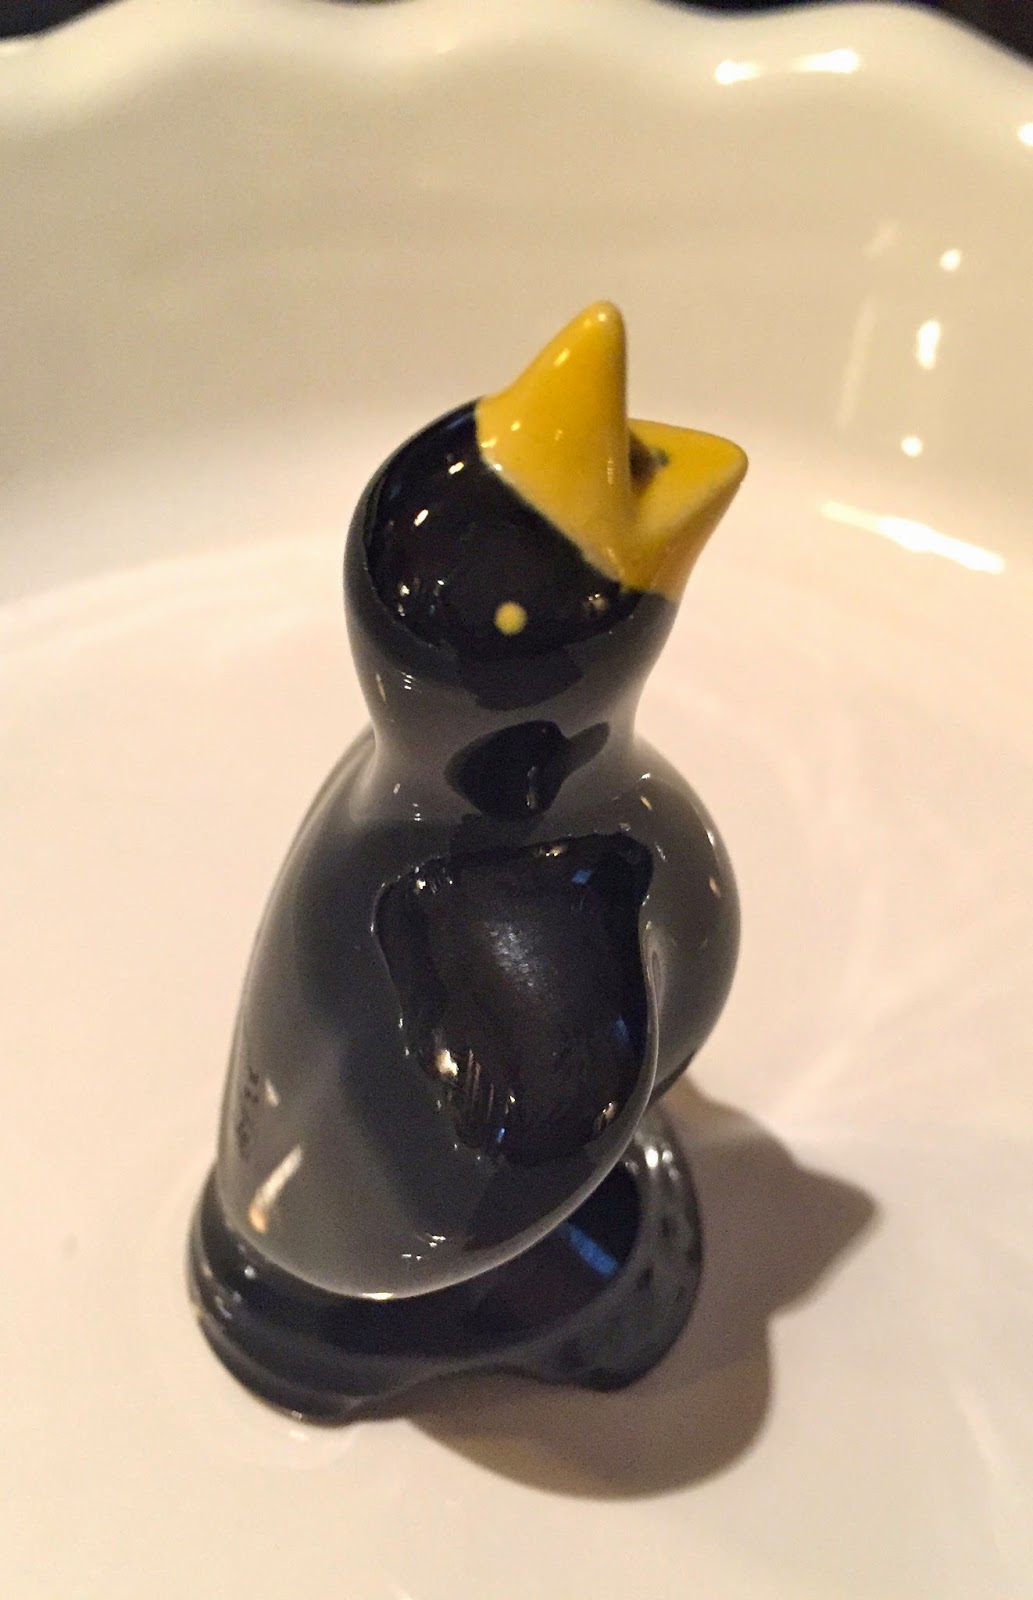
I don't even remember the first time I heard about the use of a pie bird to ensure an especially flaky pie crust. It's been years. At the time, I looked high and low for one as I could easily picture one of my grandmas using one to support her crust as she piled heaping layers of apples to form the much awaited treat. Not only does the pie bird support the crust, but it vents the crust, too. By allowing steam to escape through its beak, the pie filling won't boil over and leak through the crust. With no luck in finding one, I frankly forgot about it.

What a delight to run across one at a little boutique in Dalton, Georgia during the holidays! At a time when you're supposed to be looking to buy gifts for others, this was one of those "to me from me" gifts that I couldn't pass up. I couldn't wait to use it. Then I realized I really don't love good 'ole fashioned pies with "heaping layers of apples" or any other fruit for that matter. I'd much rather make and eat a good 'ole fashioned chocolate meringue pie or a buttermilk pie, one of Steve's favorites.

After researching possible recipes, the solution became clear: think savory, not sweet. My chicken pot pie! Of course! The original recipe says to brown the bottom pie crust. I didn't. I layered it in a pie plate, lightly sprayed with Pam, then placed the pie bird in the center.


Add filling . . .


. . . then carefully add the top crust allowing the pie bird's beak to poke through.


I'm still grateful to my friend Renee who first shared her recipe with me when our girls were in elementary school. It is already in our family cookbook. (By the way, the secret ingredient is the cream cheese.) I have made this over and over as it’s the perfect “comfort food.” Yet Steve and Keely agreed that last night's version was the best one to date. The addition of the pie bird indeed yielded a much flakier crust.


After taking me years to finally find my pie bird, I ran across another one in a boutique in downtown Franklin last month. I snatched it up for Keely. I'm thinking these little guys are making a comeback. I don't know what took them so long!

Chicken Pot Pie

Ingredients:
  • 1/2 block of cream cheese
  • 2 cans cream of chicken soup
  • 2 cans Veg-all (I use a 16 oz bag of frozen mixed veggies instead. I also add several red potatoes, chopped and cooked.)
  • 3 cooked chicken breasts, shredded
  • salt and pepper to taste
  • may need to add a little chicken broth
  • 1 package Pillsbury pie crust in the refrigerated section
Directions:
Mix all ingredients together except pie crust and heat together. For a two-crust pie, brown 1 Pillsbury pie crust in a deep round 2-quart casserole dish. Pour in filling. Top with other crust. Bake at 375 degrees for approximately 40 minutes, or until crust is lightly browned.

If using the pie bird method as described above, don't brown the bottom pie crust before adding filling. Also, bake for approximately 25-30 minutes instead of 40 minutes. You will have extra filling if using a pie plate instead of a 2-quart casserole dish. This is perfect for making individual freezer portions.

Note: This freezes really well. I have only done this with a one-crust pie. Pour filling into any size of casserole dish/pie plate that has been sprayed with Pam. (This is great to divide into smaller portions for multiple make-ahead meals.) Top each smaller casserole with crust and cover with aluminum foil. Don’t bake before freezing. When ready to eat, bake at 375 degrees for about 75 minutes if frozen, or until hot and bubbly.

Sing a song of sixpence, a pocket full of rye.
Four and twenty blackbirds, baked in a pie.
When the pie was opened, the birds began to sing.
Wasn't that a dainty dish to set before the king?

Wednesday, July 3, 2013

Birthday Cake Pancakes

For Keely's 24th birthday, I knew I wanted to start the day off in a most special way. When I ran across birthday cake pancakes on Pinterest, I didn't have to look any further. It's a no-brainer. This is for a girl who carries a Kate Spade tote bag that says, "Eat Cake for Breakfast."


Of course, mine didn't look anything like the original picture, nor does anything else I make from Pinterest for that matter! These are real. And really, really good.


Next time I make them, I would change two things:
  1. Cut the recipe in half. I had twice as much batter as I needed for the three of us.
  2. Add the sprinkles to the batter as you go. . . unless you want a tie dye effect, which is pretty cute, too.
Steve said that these are the pancakes he wants to eat from now on. I immediately told him, "Nope. You have to wait for your own birthday." Come to think of it, though, I think Keely was right when she posted, "Life's too short not to eat birthday cake pancakes. #sprinkles." So, I promise to not have Steve wait 350 days for this treat. Yes, we should all eat something cute on our birthday, but perhaps this is a fine motto for any other day!


Birthday Cake Pancakes

Ingredients:
  • 1-1/2 cups all-purpose flour
  • 1 cup yellow cake mix
  • 1 tablespoon sugar
  • 1 teaspoon baking powder
  • 1/2 teaspoon baking soda
  • 1/4 teaspoon salt
  • 2 eggs
  • 1-1/2 cups buttermilk
  • 1/2 cup milk
  • 1 teaspoon vanilla extract
  • 1/3 cup sprinkles 
Directions:
Heat a griddle or nonstick skillet over medium heat. Mix all dry ingredients; set aside. In a separate bowl, lightly beat the eggs with a whisk. Add the milks and vanilla and whisk to combine. Pour the wet ingredients into the bowl with the dry ingredients and stir until fully mixed. Fold in the sprinkles. 

Scoop portions (approximately 1/3 cup) onto the griddle, leaving room for the batter to spread into larger rounds. When the pancakes begin to bubble, flip and cook for another 1-2 minutes. Serve with syrup or optional icing (powdered sugar and whipping cream mixed to desired consistency).

Source: Adapted from Seeded at the Table

Saturday, January 26, 2013

Cauliflower Pizza Crust


When Keely came home for a visit last week to celebrate my birthday, we thought it would be fun to try a new recipe. She was telling me about one of her friends who regularly makes pizza using cauliflower as the crust. Pizza is one of my favorite foods, so if one can make some healthy, yet tasty substitutions, then why not? At the onset, both Keely and I admittedly had low expectations. We were just planning to enjoy the experience of making something new together and then end up eating what we thought would be "just OK." We were so wrong!

We both took a bite, looked at each other with surprise, and then began the giggles.
"No way!"
"I can't believe this!"
"This is crazy!"
"No one would ever guess this is cauliflower!"
"I'm definitely making this for my kids one day as a way to sneak in some veggies and still have pizza night!"

You're gonna love the simplicity of it, too. Start with a head of cauliflower and "rice" it. That is, chop it so finely until it looks like, well, rice. Be sure to remove the stem and leaves first. If you have a food processor, this step will be easy. Don't over-do it, though, or you will puree it. Since I don't have a food processor, I just used my food chopper.

Next, microwave the riced cauliflower for 8 minutes. To make a 9 inch round pizza crust, you will only need 1 cup of the cooked, riced cauliflower. (I ended up with about 4 cups, so I saved the extra and made pizza again later in the week.) Add 1 cup of mozzarella cheese, 1 beaten egg, 1 teaspoon dried oregano and 1/2 teaspoon garlic salt.


Mix well and pat onto the pizza stone. (For the pizza below, I doubled the recipe, but this isn't recommended. If you make the pizza too large, it has a tendency to get a little soggy in the middle.) I sprayed a little olive oil on top so that the crust browns nicely. Bake at 450 degrees for 15 minutes. Done!


At this point, add your favorite sauce, toppings (pre-cooked), and cheese. Broil for about 3-4 minutes.

Keely and I made two varieties. For the first half, we used pesto sauce, mozzarella cheese, feta cheese, spinach, sundried tomatoes and a little more oregano on top. We figured out that one generous slice was approximately 293 calories, using the MyFitnessPal app. The second half was pretty traditional:  marinara sauce, mozzarella cheese, turkey pepperoni, and a few jalapenos and banana peppers. This version had only 195 calories per slice! A few days later, we made just a plain pepperoni as shown in the first picture above. Have fun trying your own favorite combinations!


Note: Be prepared to eat each slice with a fork. But, this is a small price to pay for a low-carb, low-cal, gluten-free, healthy meal. Shhhhh. Don't tell the kids! :D

Cauliflower Pizza Crust

Ingredients:
  • 1 cup cooked, riced cauliflower
  • 1 cup shredded mozzarella cheese
  • 1 egg, beaten
  • 1 teaspoon dried oregano 
  • 1/2 teaspoon garlic salt
  • olive oil spray (optional)
Directions:
Preheat oven to 450 degrees. Remove the stem and leaves from cauliflower and "rice" it. That is, chop it so finely until it looks like grain. Next, microwave the riced cauliflower for 8 minutes. Mix together all ingredients listed above and pat onto a pizza stone or sprayed cookie sheet. Spray olive oil on top (optional). Bake for 15 minutes.

Add your favorite sauce, toppings (pre-cooked), and cheese. Broil for about 3-4 minutes until cheese is melted.
Pin It button on image hover